LABELFRAME IN TKINTER
In this tutorial, we are going to learn about the LabelFrame in Tkinter along with its features followed with a handy example.
What is LabelFrame in Tkinter?
The LabelFrame widget in tkinter is used for drawing a border around the the child widgets that it contains along with its own label. Syntax for the Labelframe is:
Labelframe_tk = LabelFrame ( windows, features )
LabelFrame features and properties are:
| 1 | bg | Displays the background color of the widget. |
| 2 | bd | It shows the width of the border. Same as borderwidth. |
| 3 | cursor | You can use the cursor as different shapes on the screen as circle, dot etc. |
| 4 | fg | Determines the foreground color of font that is used for the widget. |
| 5 | font | Determines the type of font that is used for the widget. |
| 6 | height | Determines the height of the widget. |
| 7 | labelAnchor | Specifies the position of the text within the widget. |
| 8 | labelwidget | Specifies the widget used for identifying the labels. Text is used as default if no value is defined. |
| 9 | highlightbackground | It shows the highlight color of the background of the text widget when it is clicked. |
| 10 | highlightcolor | It shows the highlight color of the labelframe widget when it is clicked. |
| 11 | highlightthickness | Specifies the thickness of the highlight in focus. |
| 12 | padx | Adds padding in the horizontal direction |
| 13 | pady | Adds padding in the vertical direction |
| 14 | relief | This displays different types of borders. By default, it has a FLAT border. |
| 15 | text | Specifies the string which has the label text. |
| 16 | width | Specifies the width of the widget. |
Creating LabelFrame
You can create simple a labelframe widget as follows:
from tkinter import *
screen = Tk()
screen.geometry('300x300')

labelframe_tk = LabelFrame(screen, text="LabelFrame Title")
labelframe_tk.pack(fill="both", expand="yes")

inside = Label(labelframe_tk, text="Add whatever you like")
inside.pack()

screen.mainloop()
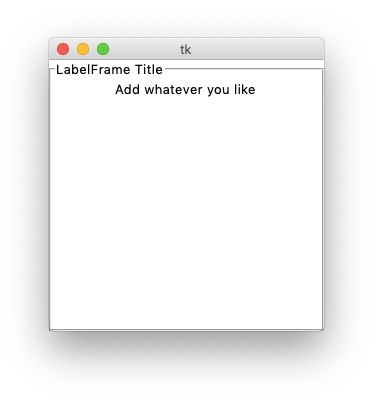
Output will be:

References have been used from here


